Note
Access to this page requires authorization. You can try signing in or changing directories.
Access to this page requires authorization. You can try changing directories.
After you set up a data source for Fabric Activator, assign your events to objects. Assign events to objects when there's a distinct entity you want to track, such as a device, machine, package, or store. Each object uses a Unique Identifier to track individual instances over time. The examples in this article use the Package delivery events sample that comes with Fabric Activator, where packages are the entities being tracked. Substitute your own values when working with your own data.
Note
If you use a query-based source (Power BI, KQL queryset, or Real-Time Dashboard), Activator handles data binding differently and might create objects automatically. This article applies primarily to streaming sources such as eventstreams, Fabric events, and Azure events.
Prerequisites
- A workspace with a Microsoft Fabric-enabled capacity.
- A streaming data source connected to an Activator item, such as an eventstream. To set up a streaming data source, see Ingestion from Eventstreams.
Assign data to a new object
Open an Activator item that has a streaming data source connected to it, or create a sample activator to use the Package delivery events sample eventstream.
Note
The Activator item must be running for New object to be available in the ribbon. If it isn't started, select Start from the ribbon, then go back to your workspace and reopen the Activator item.
In the Explorer pane, select the eventstream you want to assign to an object. For example, select the Package delivery events eventstream.
Select New object from the ribbon. The Build object pane opens with Create a new object selected by default. Provide the following values:
- Object name: A name for the entity you're tracking.
- Unique Identifier: A column in your events that uniquely identifies each instance you're monitoring.
For this example, choose Package as the object name and Package ID as the unique identifier.
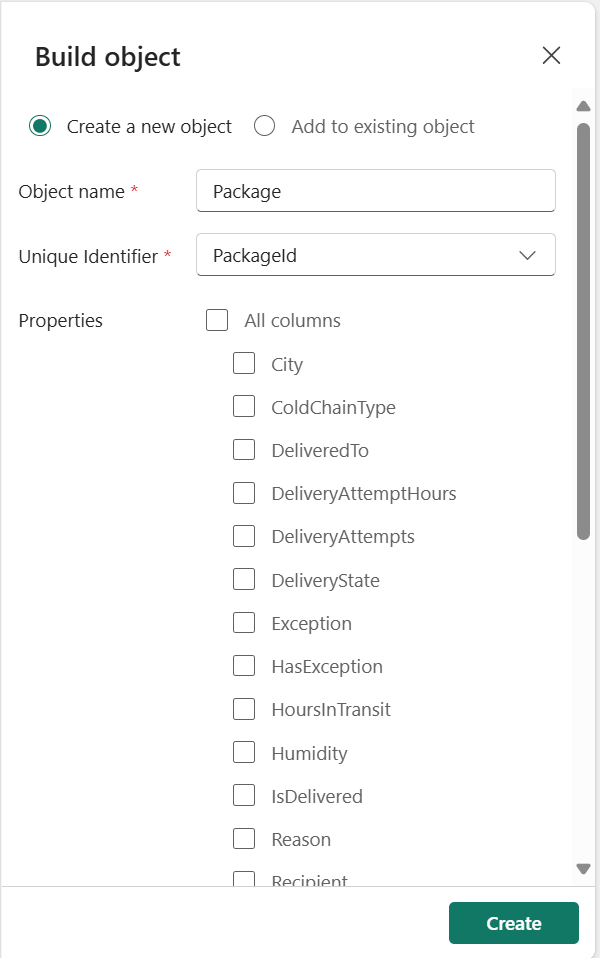
Select Create.
After Activator creates the object, you see the columns received from that eventstream. The events are organized by the values in the unique identifier column.
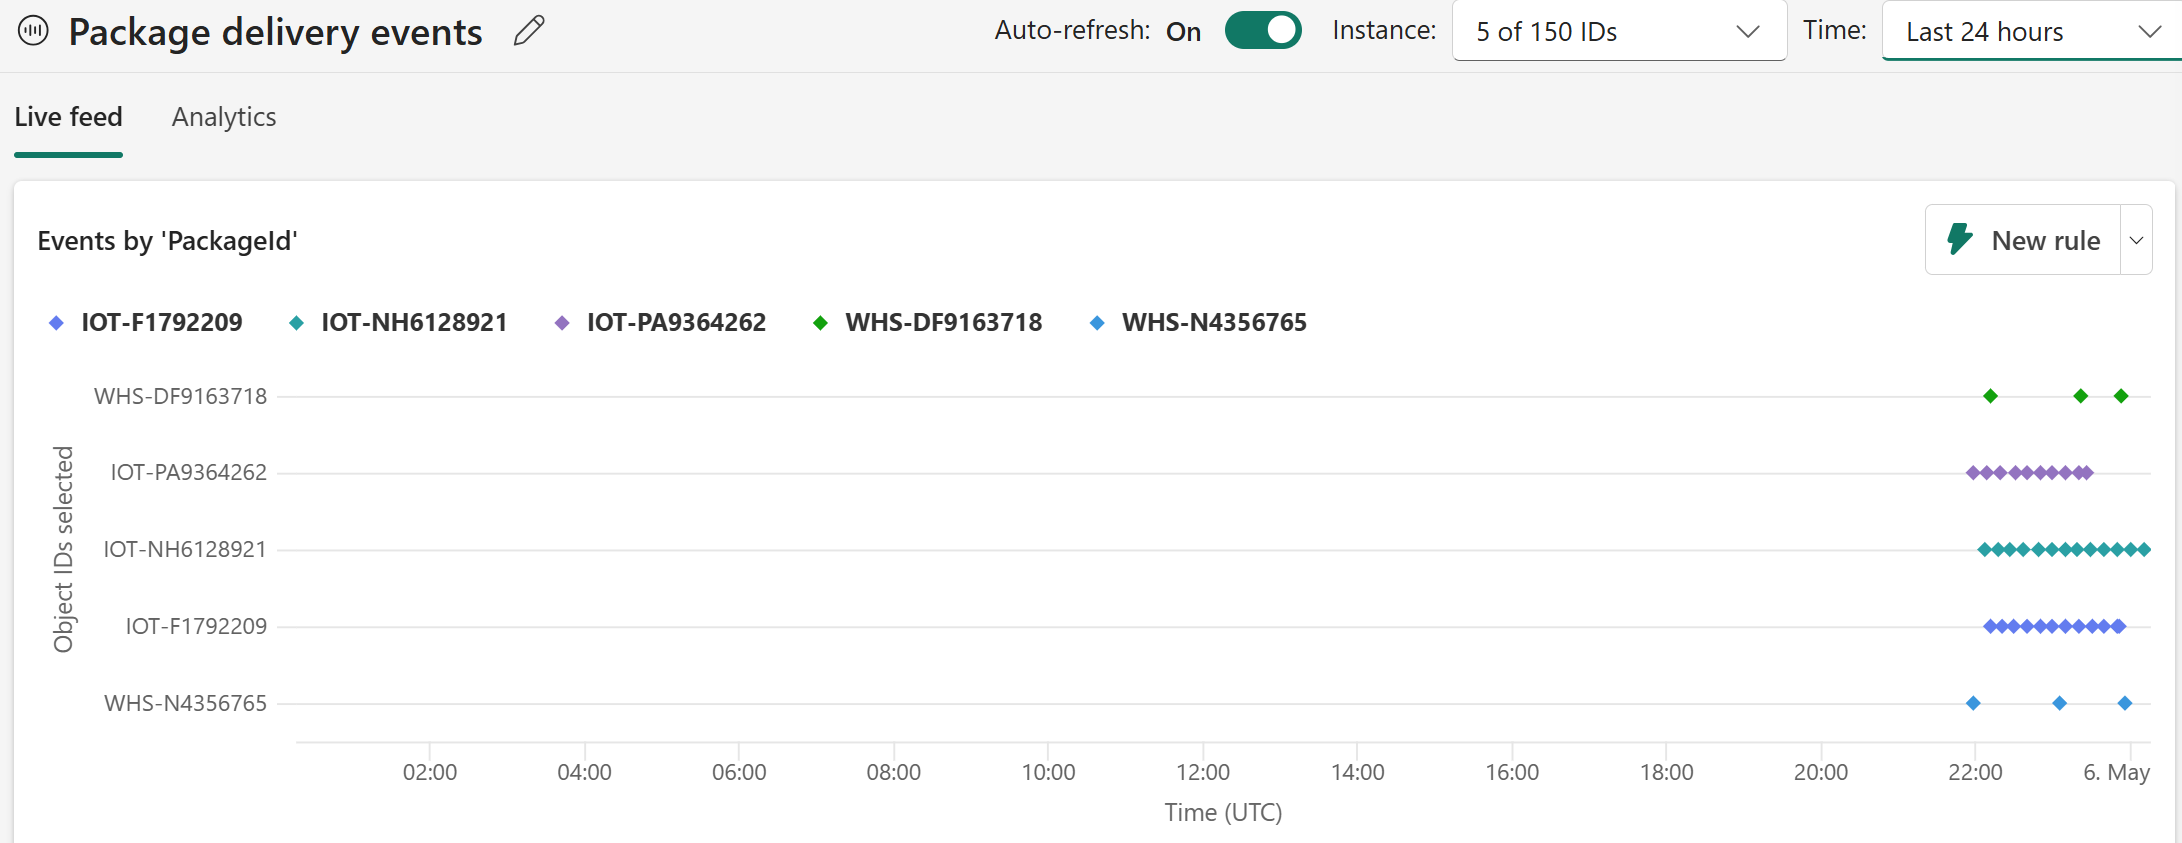
By default, the chart shows events for five of the available object instances over the Last 24 hours. Use the Instance and Time selectors in the upper right corner of the chart to change these values. You can also toggle Auto-refresh to control whether the chart updates automatically.

Assign data to an existing object
You can assign multiple eventstreams to a single object. Assigning multiple streams to one object is useful when data about the same entity is spread across multiple streams. For example, if slowly changing reference data arrives in one eventstream and fast-moving updates arrive in another. When you assign data to an existing object, choose a Unique Identifier that references the same IDs used when you first created the object. Otherwise, properties and rules produce unexpected results.
For a complete walkthrough using two eventstreams, see Combine multiple eventstreams in an Activator rule.
Assign an event source to multiple objects
You can assign columns from a single event source to multiple objects. Assigning one event source to multiple objects is useful when your event source contains data for more than one entity. For example, the sample Packages eventstream contains both a PackageID and a City column. Creating a Package object lets you track and set rules on individual packages. For example, alert when a specific package's temperature exceeds a threshold. Creating a separate City object from the same stream lets you track conditions at the city level. For example, monitor the total number of packages in transit across a city or detect when a city's delivery volume drops unexpectedly. Each object type has its own rules and properties, so you can monitor and act on both the individual and aggregate level from a single eventstream.
Follow the steps in Assign data to a new object to create your first object. For example, create a Package object using PackageID as the unique identifier.
Go back to your workspace, then reopen the Activator item and select the same event stream in the Explorer pane.
Select New object from the ribbon.
In the Build object pane, Create a new object is selected by default. Enter a name for the second object and choose a different column as the unique identifier. For example, name the object City and select City as the unique identifier.
Select Create.
Repeat steps 2–5 for each additional object you want to create from the same eventstream. For more information about creating properties and aggregate measures on your objects, see Create properties.